Online food ordering system
Account registration & setup
Start your free setup.
You can create your ordering page yourself for free, right away.

Step one: create your account
Complete the signup form to register your restaurant and start building your ordering page.
Sign up & try nowNo credit card required. Free setup.
-
Step one: create your account
Complete the signup form to register your restaurant and start building your ordering page.
-
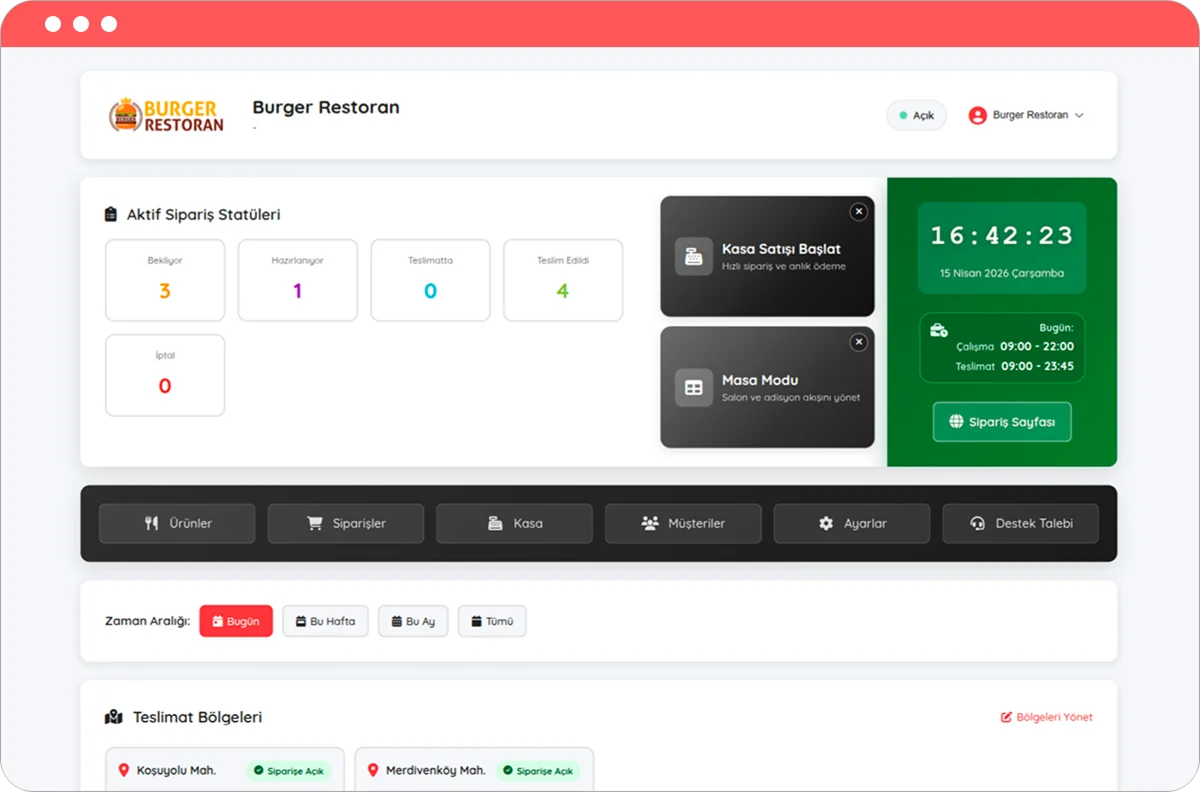
Panel & order management
After signup you can manage products, catalog, extras, and all other settings in the admin. Contact us if you need help with setup.
-
Publishing your page
When setup is complete, publish your ordering page and start accepting orders. Preview on desktop and mobile first to check your menu and contact details.
Business settings
In the admin, set up payment options, storefront branding (logo and icon), and your business and branch details.
Restaurant & branch: Review core business information, contact details, and hours in the panel.
Payments: Enable the delivery-time payment options and any online methods you use, then save.
Branding: Add your logo and icon so your storefront reflects your brand.
Quick menu setup
Use ready-made templates to build your menu in seconds and test the system right away. When you prefer, customise every item to match your own products with ease.

Delivery zone settings
Split your service area into delivery zones and set delivery fee, minimum order, and estimated delivery time separately for each. The on-screen zone summary helps you show customers the right conditions.
-
Delivery zones: Define the areas you serve as separate zones so customers see the correct fee, minimum order, and time for their address.
-
Fees and timing: Customize delivery fee, minimum order, and estimated delivery time per zone.
-
Tip: Multi-zone configuration is easier on a large screen; review everything before you go live.


Theme
Use theme options to shape your storefront: layout, colours, and overall style to match your brand.
Layout: Choose how products are arranged on desktop and mobile.
Colour & style: Pick a theme colour and preset look that fits your brand.
Themes: Use the theme options in the admin to shape your storefront. If you need a fully bespoke design, contact our team.
Menu settings
Build your menu in the admin with categories, products, and product options (extras).
Categories: Group your menu into sections and keep names and order aligned with how you sell.
Products: Add each item with its basics, price, and optional photos.
Options: Link option groups—sizes, add-ons, removals, and similar choices—to the right products.


Go live
Preview your ordering page on desktop and mobile; when it looks right, go live and take orders.
Desktop & mobile: Open your public page on a large screen and on a phone to review layout and readability.
Content: Confirm menu, prices, and contact details are up to date and consistent.
Go live: When checks look good, publish and start accepting orders.